


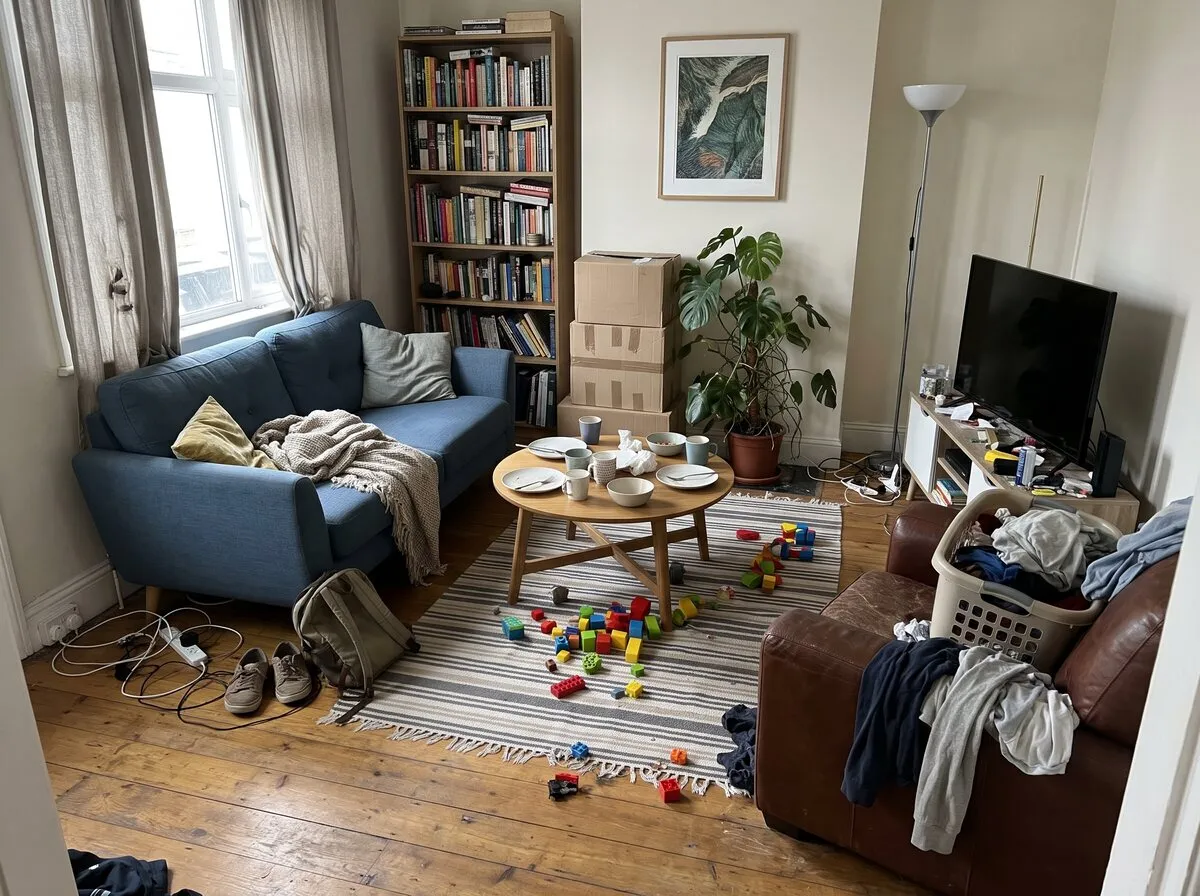
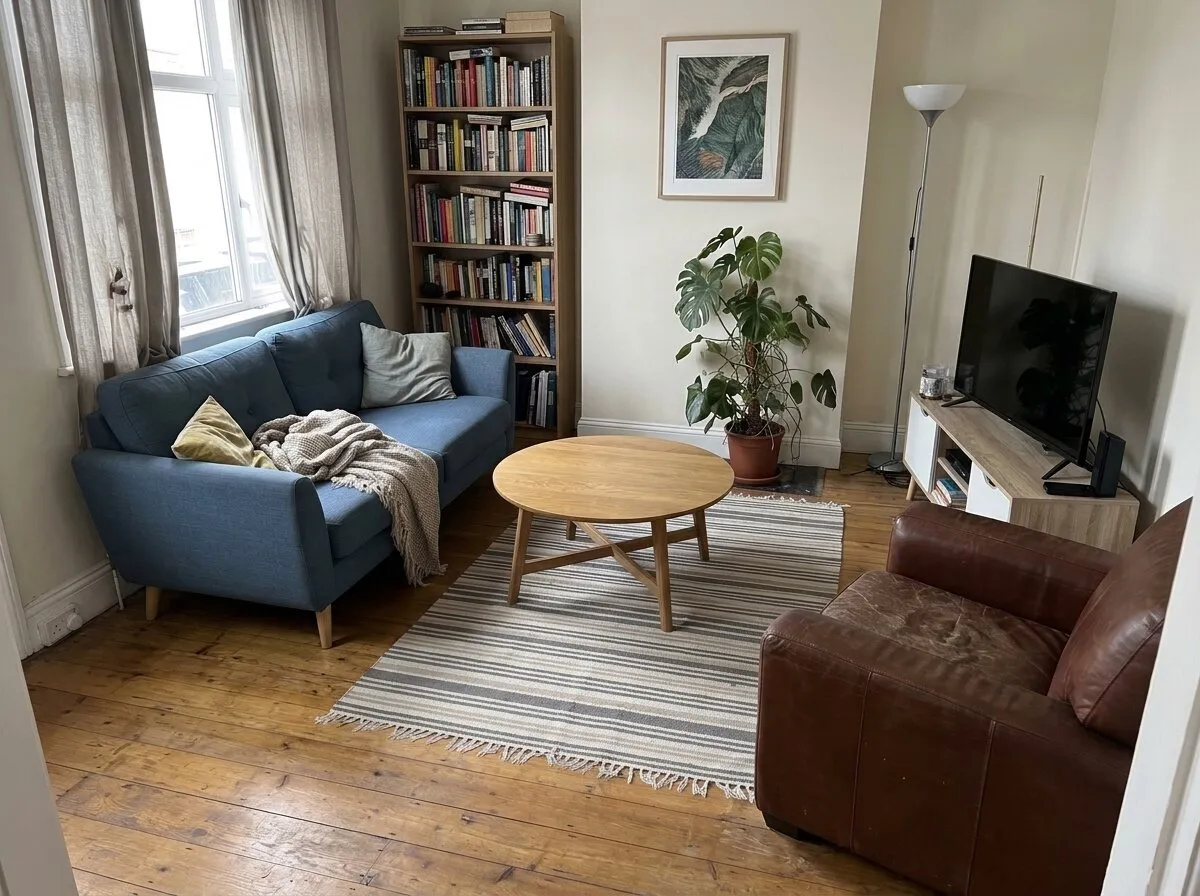
How it works
- Add a photo of the messy room. Stand in a corner and fit in as much of the room as you can. No photo handy? Start with a sample room, or pick a design you made earlier.
- Pick the room type. Living room, bedroom, kids’ room, home office and more. There is no wish to type: the tool is built to take out the loose clutter and to leave the furniture.
- See the tidy room. Compare before and after with the slider. If something stayed behind, run it again. Or keep going with another tool: try a new layout, repaint the walls or type any change.
Examples: cluttered rooms, tidied
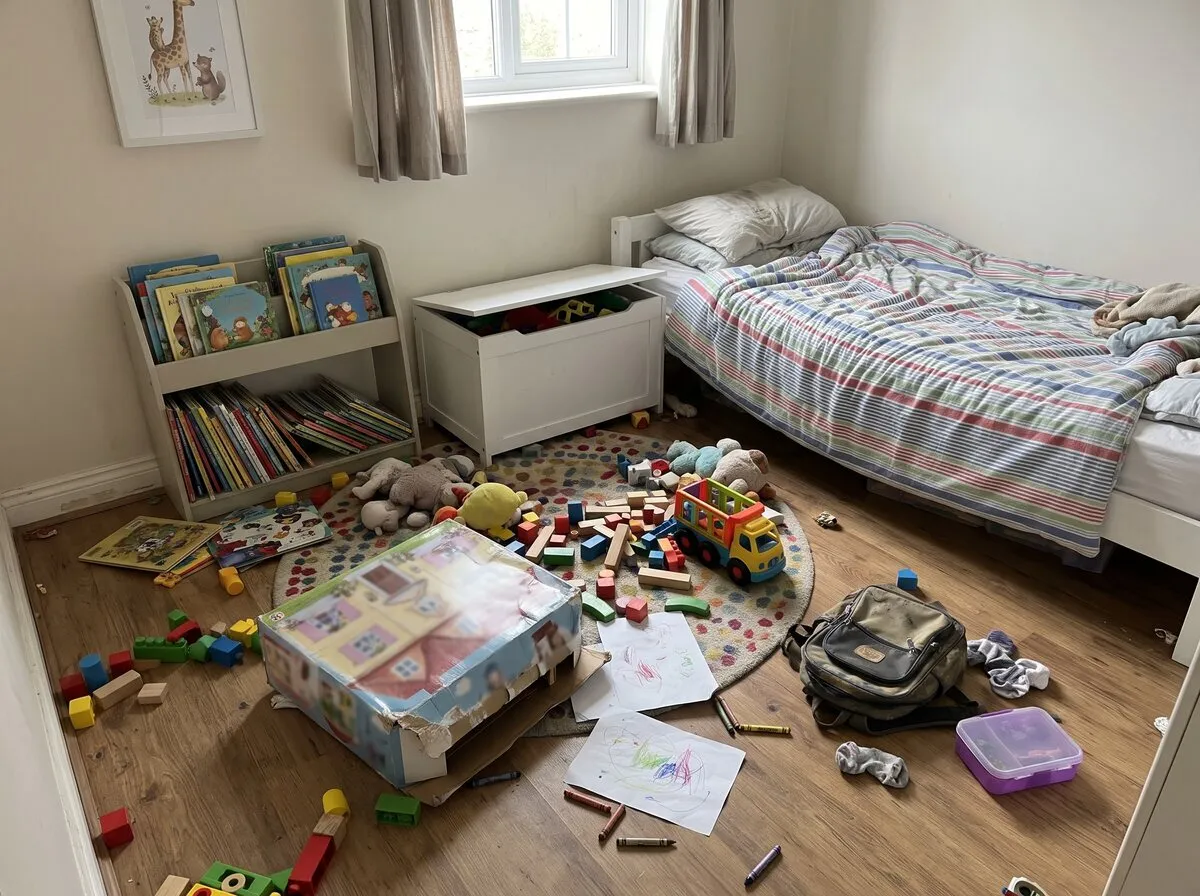
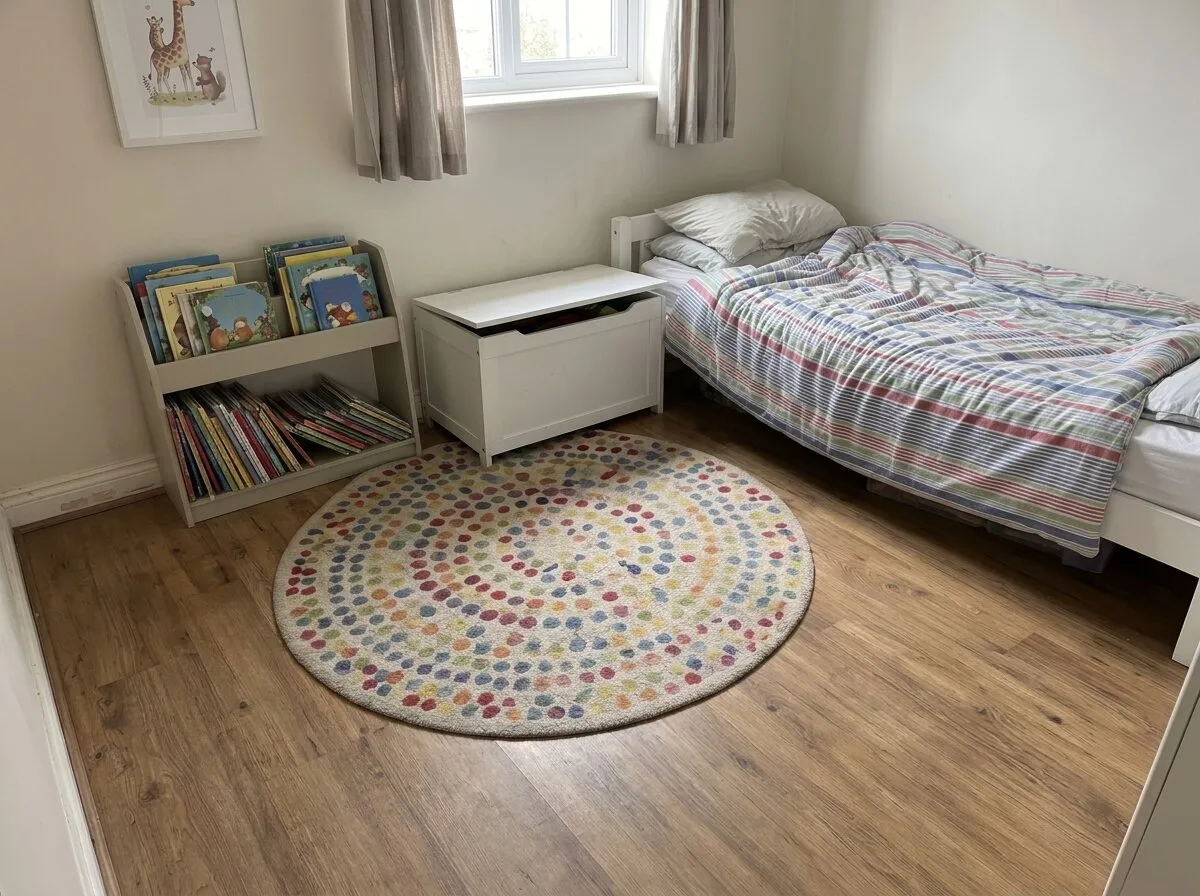
Auto declutter: the toys, blocks, dolls' house box, backpack and drawings went; the bed, toy chest, book rack, rug and print stayed.
Before: an AI-generated sample room. After: the result from roomvia.
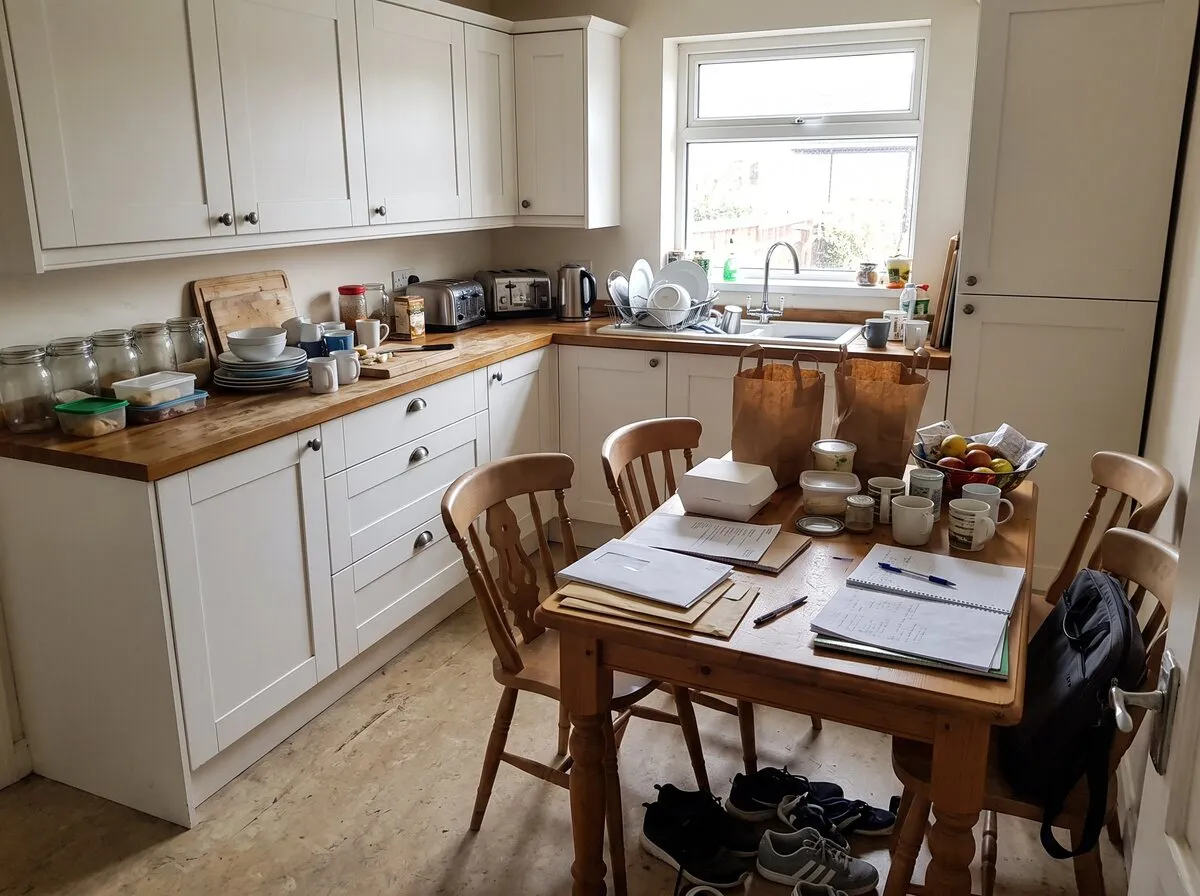
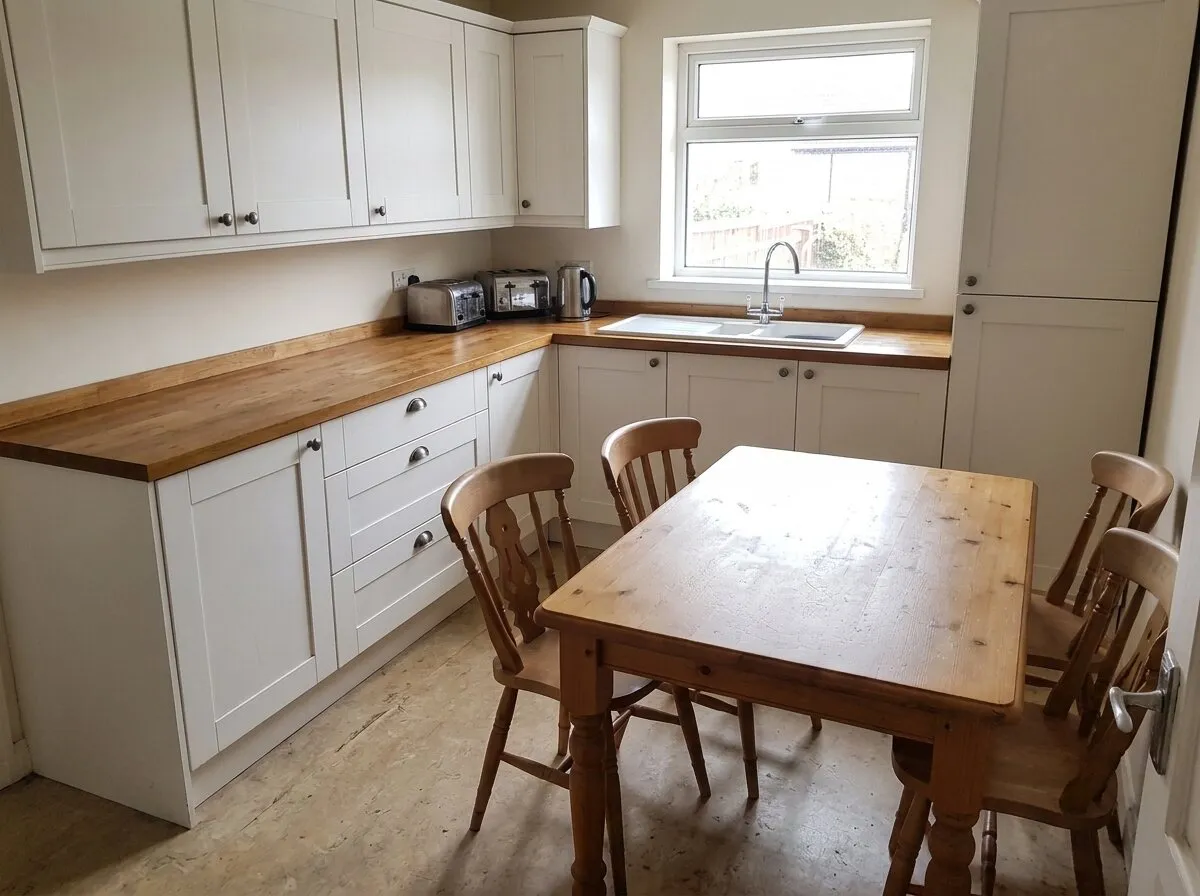
Auto declutter: the jars, dishes, papers, bags, fruit bowl and shoes went; the cabinets, toasters, kettle, table and chairs stayed.
Before: an AI-generated sample room. After: the result from roomvia.
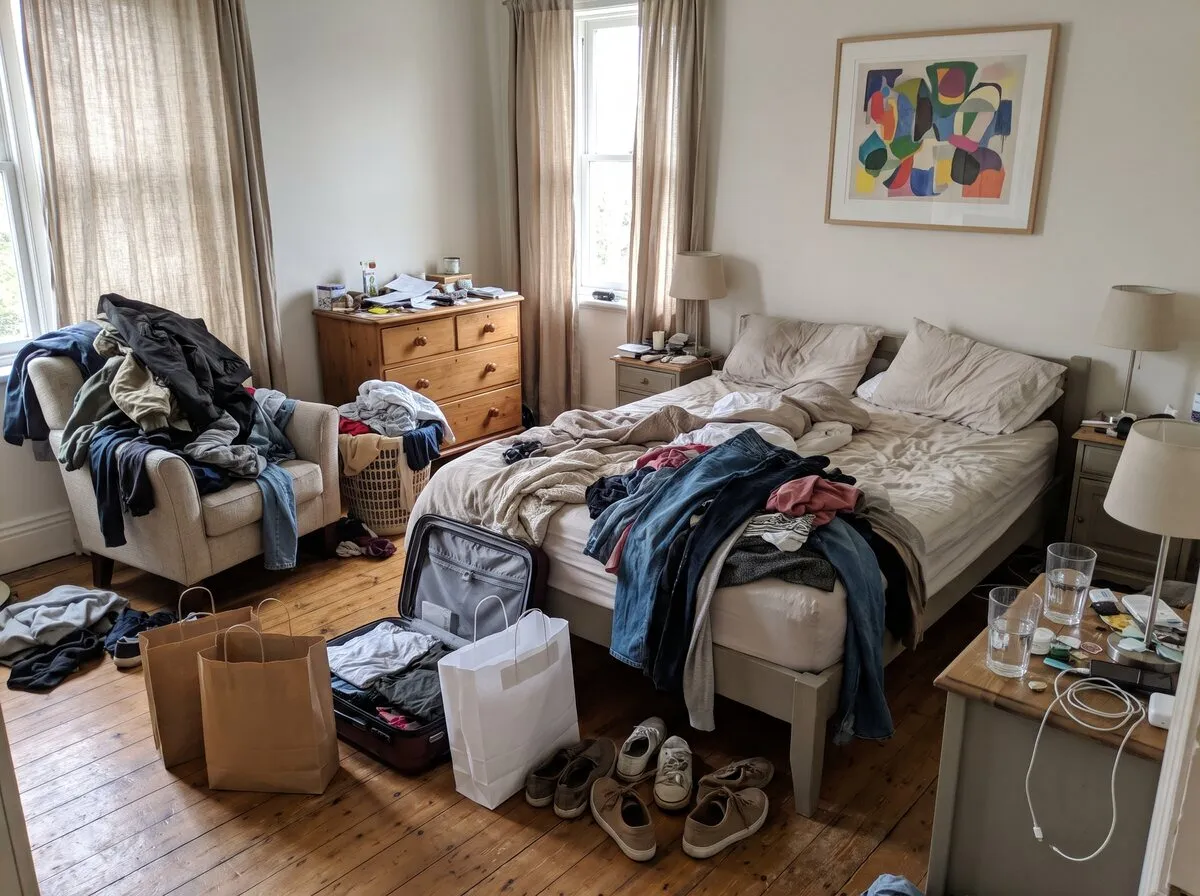
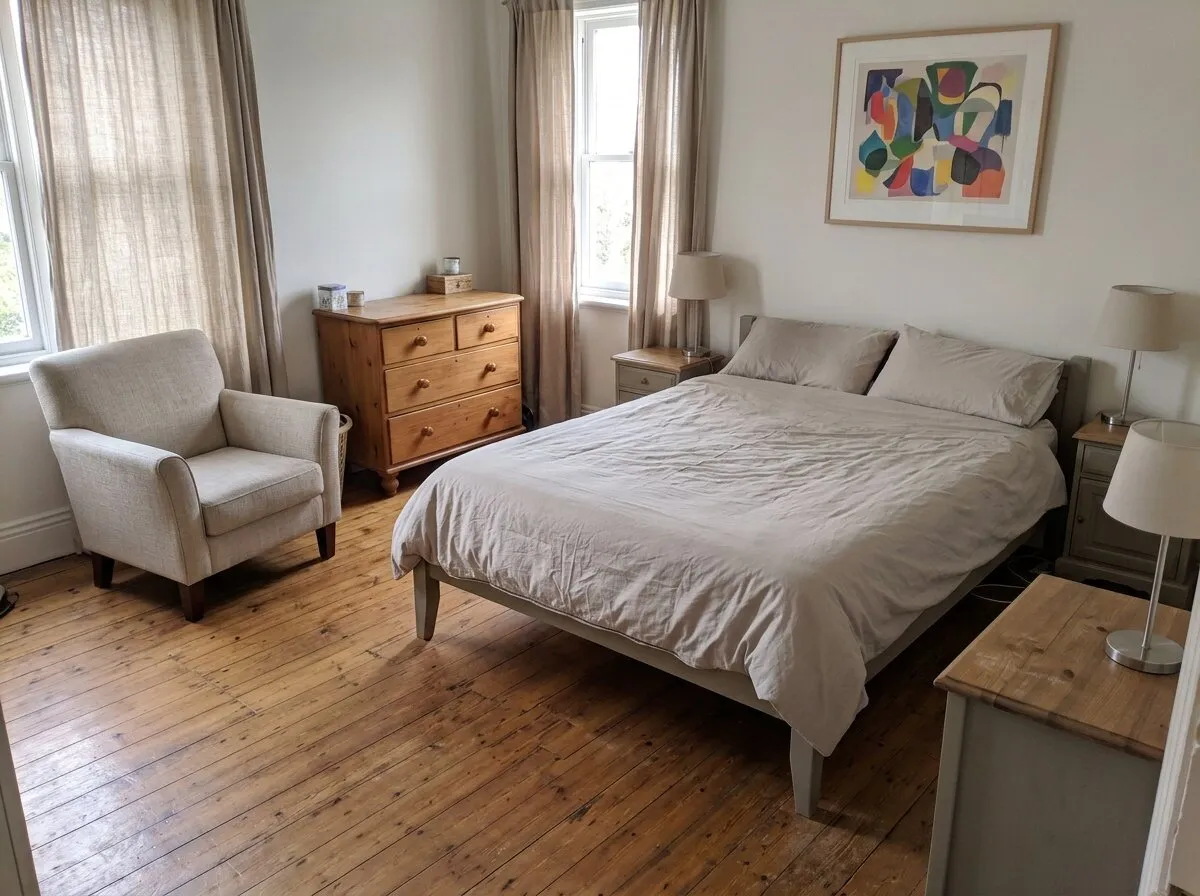
Auto declutter: the clothes, bags, suitcase, shoes, glasses and charger went; the bed (now made), armchair, chest of drawers, lamps and print stayed.
Before: an AI-generated sample room. After: the result from roomvia.
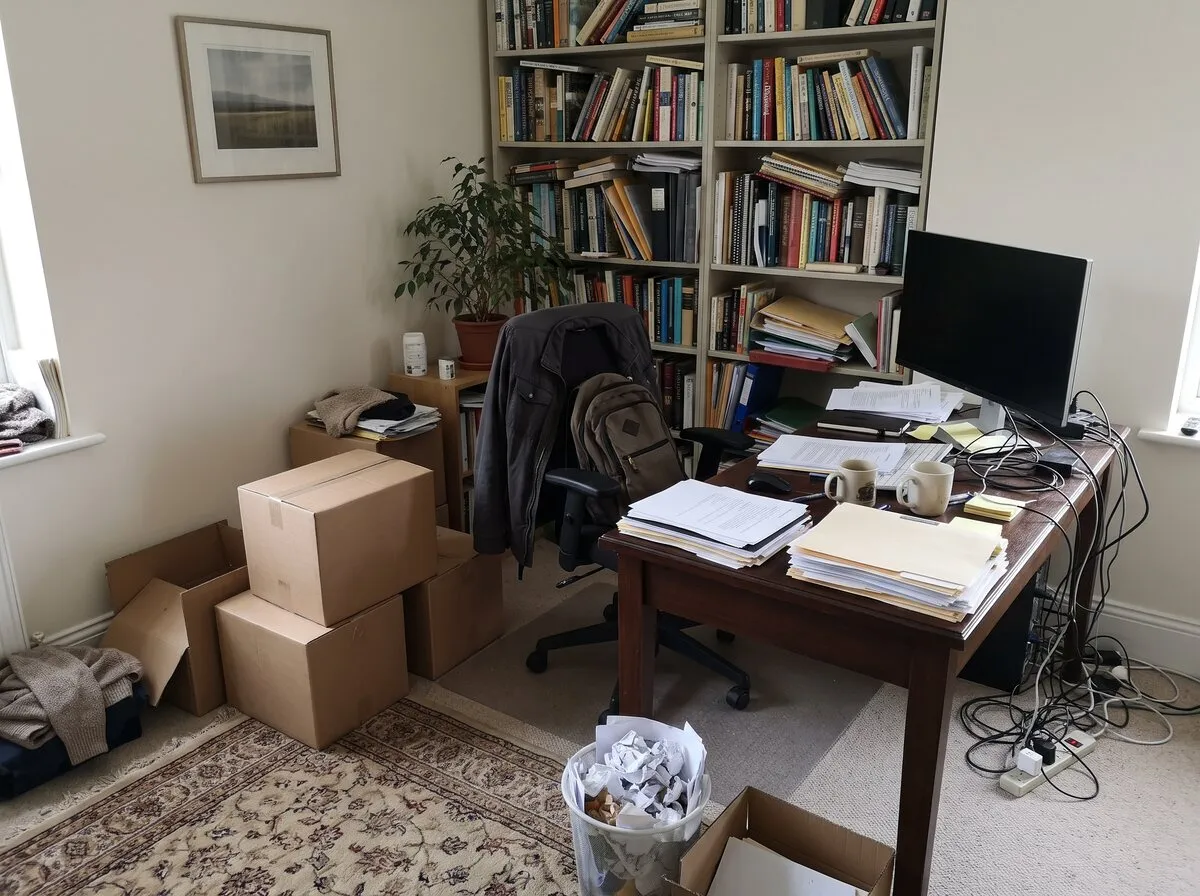
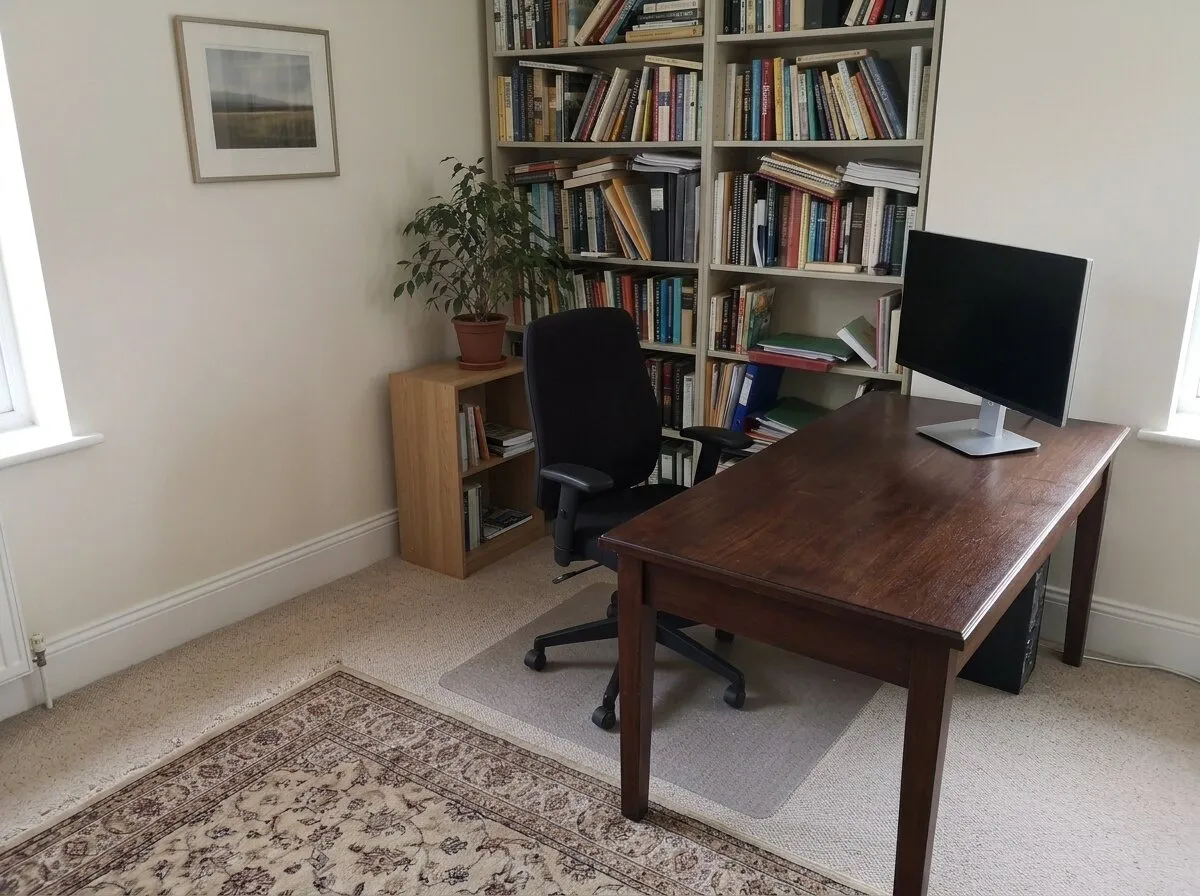
Auto declutter: the boxes, papers, mugs, cables, bin, jacket and backpack went; the desk, chair, monitor, bookcases, plant and print stayed.
Before: an AI-generated sample room. After: the result from roomvia.
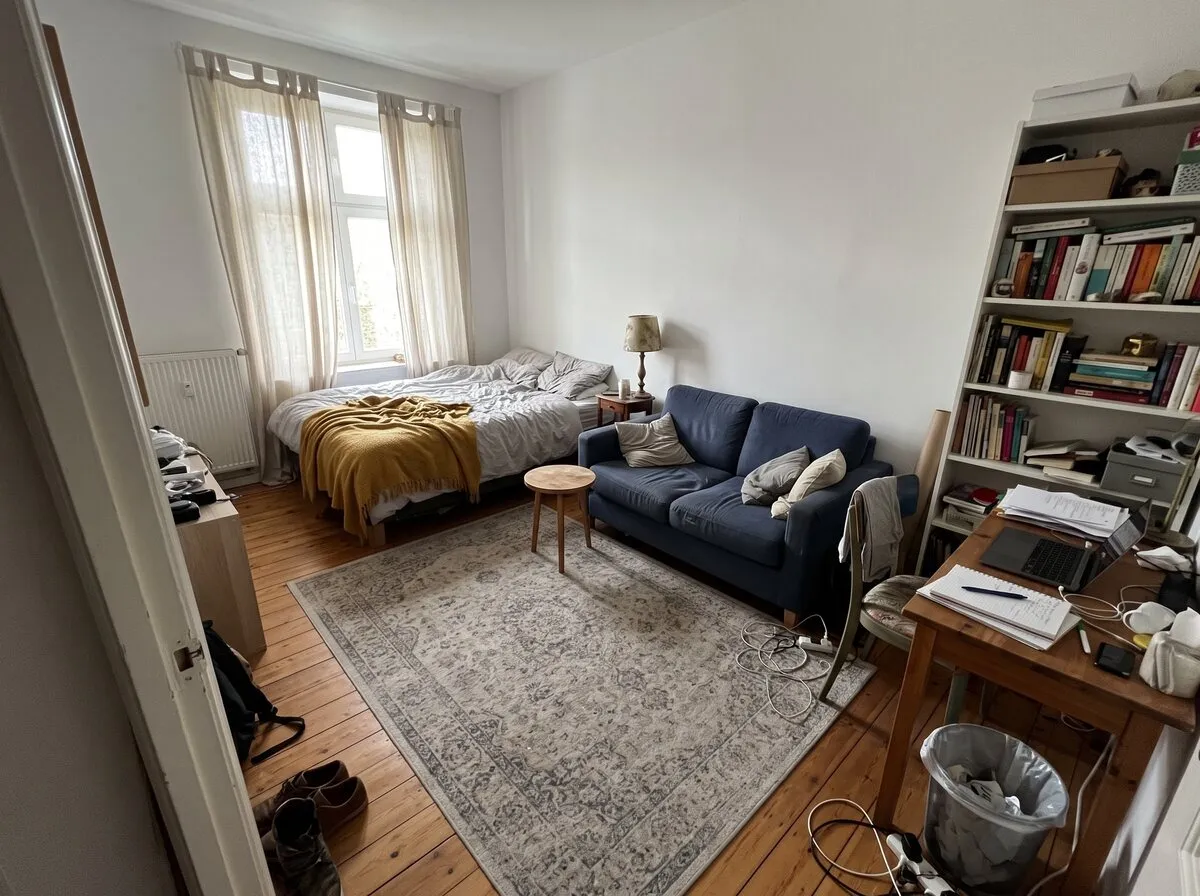
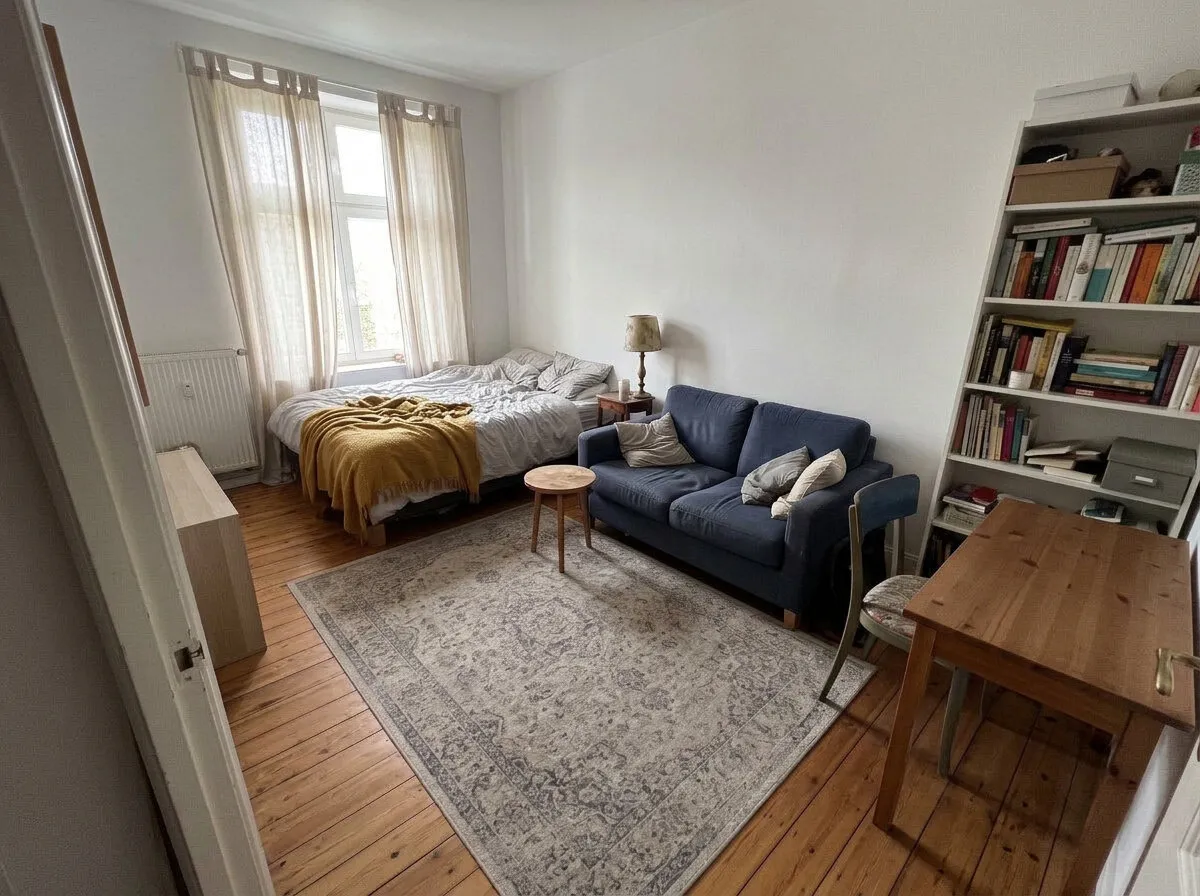
Auto declutter: the laptop, papers, cables, shoes, backpack and wastebasket went; the bed, sofa, rug, desk and bookshelf stayed.
Before: an AI-generated sample room. After: the result from roomvia.
Tips for better results
- No need to tidy first. Take the photo as the room is today: clothes on the chair, toys on the floor, papers on the desk. That is what the tool is for.
- Show the whole room. The tool can only tidy what the photo shows. A wide shot from a corner, with the phone held straight, works well.
- Turn on the lights. Open the blinds too. Where clutter goes, the picture has to show what was under it, and a bright, sharp photo gives the tool more to match.
- Pick the right tool. To take out one object, use Brush erase. To empty the room, furniture and all, use Remove furniture.
- Run it again on the result. If a bag or a pile of papers is still there, run Auto declutter on the new design. Each run gives one result.
- Make a list from it. Compare before and after, and write down what needs a home: the shoes by the door, the toys on the rug, the papers on the desk. A basket, a hook or a shelf for each is a good start.
What it can’t do
- It can miss small items. A charger, a sock or a few papers can stay behind. Look at the floor, the table tops and the corners, and run it again if something is left.
- It can take out something you wanted to keep. The line between clutter and decor is a guess. A plant, a vase or a pile of books on a table can go with the clutter. If you want it in the picture, run it again.
- It can change what was under the clutter. The photo doesn’t show the floor under the clothes or the sofa under the bags. The tool fills them in, so a cushion, a throw or the floor there can come out plainer, smoother or a little different.
- Check the furniture. The sofa, the bed, the shelves and the table are meant to stay as they are. So are the walls, windows and doors. If a piece moved, changed shape or vanished, the design isn’t your room. Run it again.
- It doesn’t clean or repair. Stains, scuffs, a worn floor or a chipped wall are not clutter. They can stay in the picture, or be guessed over where clutter stood. The tool is built to tidy the room, not to clean or repair it.
- It doesn’t add storage or move furniture. To try a new layout, use Rearrange furniture on the new design. To add a shelf or a basket, use Custom edit.
- Results vary. Two runs on the same photo can give two different results.
- It’s a picture, not a plan. It shows the room without the clutter. Where each thing goes is still up to you.
Questions
What does it remove?
It is built to take out the clutter and the loose items: clothes, shoes, bags, toys, dishes, papers, boxes and the like. You don’t pick the items. The tool decides what counts as clutter.
What stays?
The tool is built to keep the furniture as it is, along with the curtains, rugs, cushions, lamps, plants, wall art and books on the shelves. It is also built to keep the walls, windows, doors and camera angle. Check the result. If something moved or went missing, run it again.
How is it different from Remove furniture and Brush erase?
Auto declutter is built to take out the clutter and leave the furniture. Remove furniture is built to empty the room: the sofas, rugs, curtains and decor go too. Brush erase removes the object you brush over. To clear the mess and then one last thing, run Auto declutter, then Brush erase on the new design.
Which rooms does it work for?
Rooms inside your home: living rooms, bedrooms, kids’ rooms, kitchens, home offices, entryways and more. You pick the room type before you start.
Can I keep designing once the room is tidy?
Yes. Every tool also works on an earlier design. Open the tidy room in Rearrange furniture to try a new layout, repaint the walls, or type any change, like “add a bookshelf by the window”.
Can I use it for a listing photo?
The simplest listing photo is the room after a real tidy-up: let the design show you what has to go, then tidy and take the photo. If you post the decluttered picture, be clear about what it shows. It is digitally altered: it leaves out things that are in the room today, and the tool fills in what was under them. You may need to say the photo was digitally altered and show the original photo as well. In California, for example, real estate licensees, and people acting for them, must put a reasonably conspicuous statement on or next to a digitally altered image in every ad for a sale, with a link, URL or QR code to the unaltered photo and words saying it can be seen there. Free designs carry a roomvia watermark, and some MLSs, such as San Diego MLS, ARMLS and Stellar MLS, don’t allow branding or extra text on listing photos. Our free virtual staging disclaimer label tool adds the statement and your link or QR code to photos for ads, and gives you clean copies and field text for the MLS, in your browser. More in Virtual staging disclosure: California AB 723 and MLS rules. Check your local rules and your MLS before you post. This is not legal advice.
Is it free?
No sign-up is needed to start. New accounts may get a few free designs, which carry a watermark. Plans and prices are shown in the app before you buy.
What happens to my photo?
Before your first design, the app names the AI providers that process your photo and asks for your OK. Photos and designs are deleted 90 days after a design is made; reusing a design keeps it longer. There is no public feed.
Can I use it on my computer?
No. roomvia runs on iPhone and Android. There is no web editor today.